






Lockable Magnetic Mount for Starlink Standard 4 and 4 X
$109.99
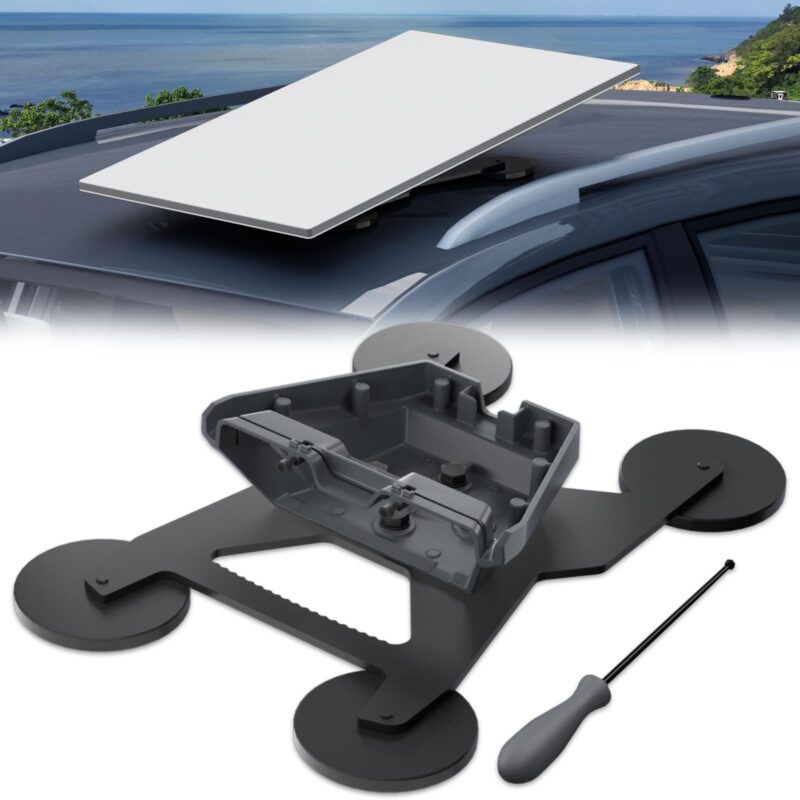
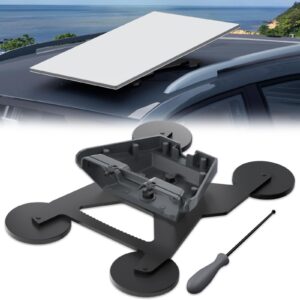
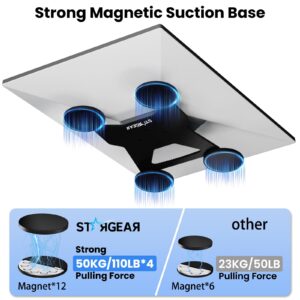
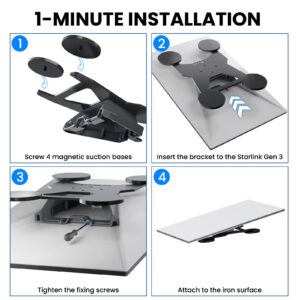
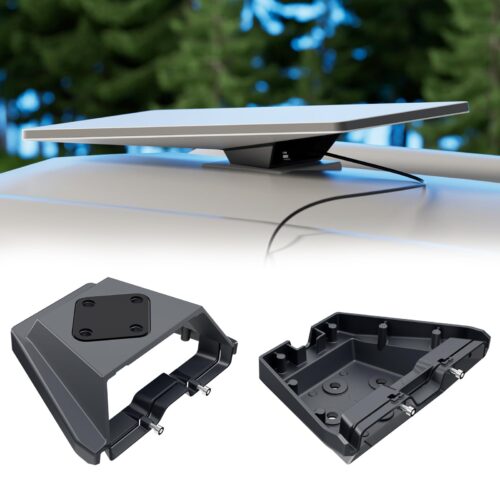
Mount your Starlink Standard 4 or Standard 4 X dish on a compatible steel surface with four 88 mm magnetic bases and no drilling. The black aluminum alloy bracket holds the dish at a fixed 8° tilt, and locking screws fasten it to the bracket.
| Brand | STARGEAR |
|---|---|
| Model Name | SG-GEN3-4LegMount-BK |
| Product Type | Lockable magnetic dish mount |
| Color | Black |
| Bracket Material | Aluminum alloy |
| Compatible Devices | Starlink Standard 4 and Starlink Standard 4 X |
| Mounting Type | Magnetic attachment to compatible steel |
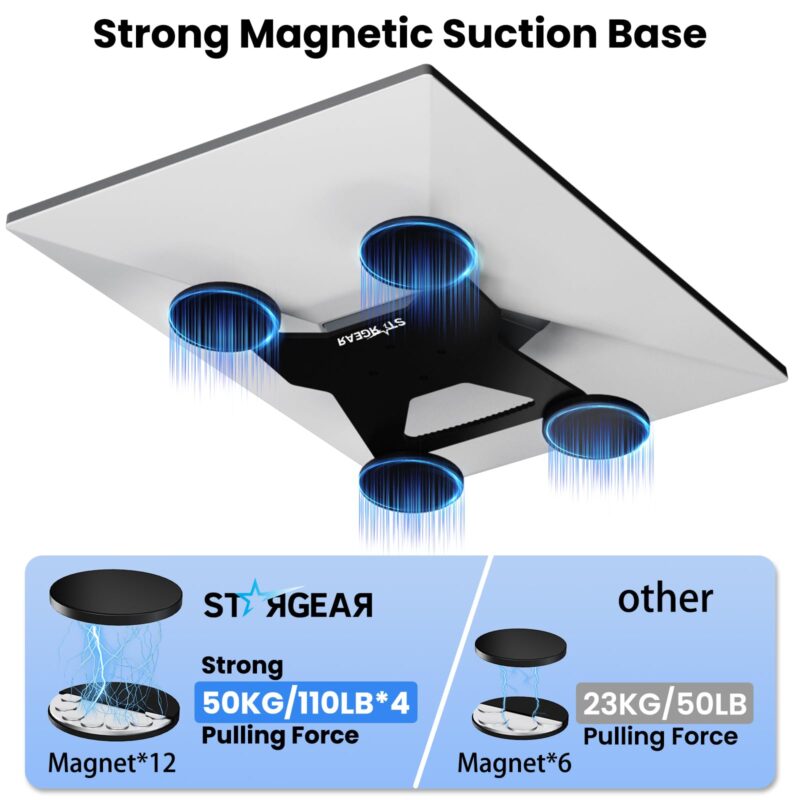
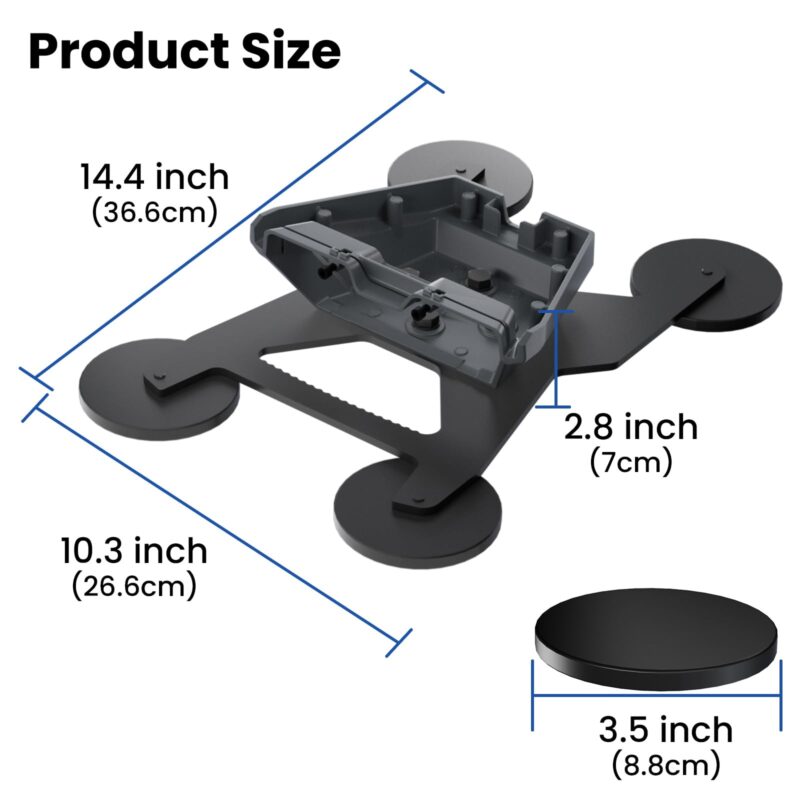
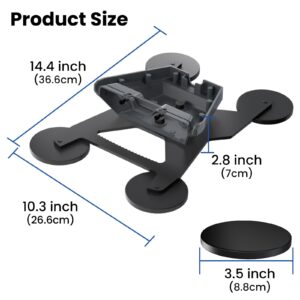
| Magnetic Bases | 4 round bases, 88 mm diameter each |
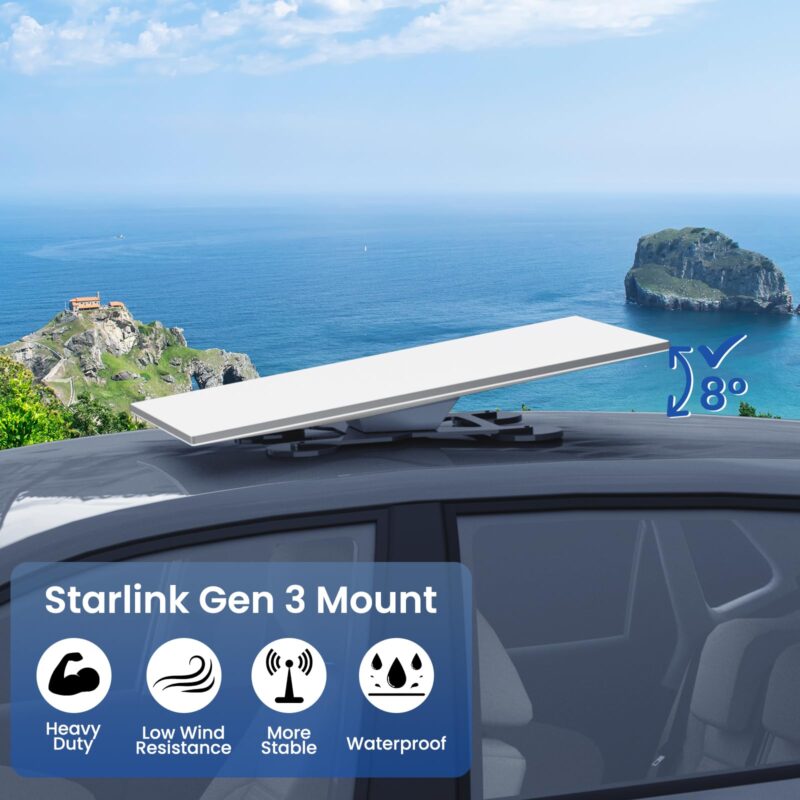
| Bracket Angle | Fixed 8° tilt |
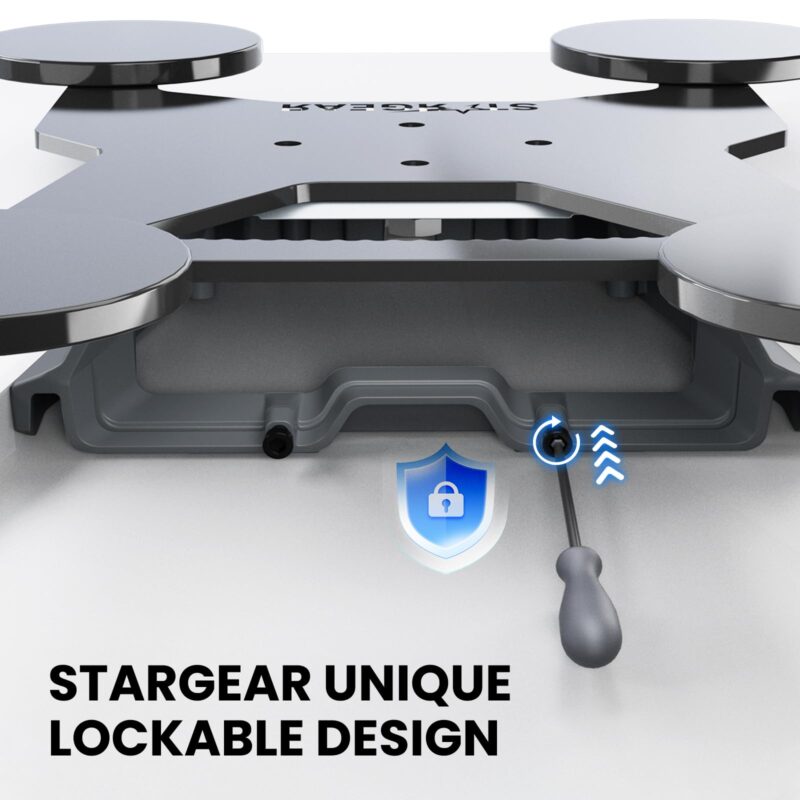
| Special Feature | Dish retaining screws |
| Included Components | 1 mounting kit with a lockable bracket and 4 magnetic bases |
Starlink Standard Magnetic Mount with Four Magnetic Bases
The Starlink Standard Magnetic Mount uses four round magnetic bases to attach to compatible steel without drilling. A black aluminum alloy bracket holds the dish at a fixed 8° tilt.
The mount gives you two things to check at setup: how the feet meet the steel and how the locking screws hold the dish in the bracket.
Check Your Dish Model
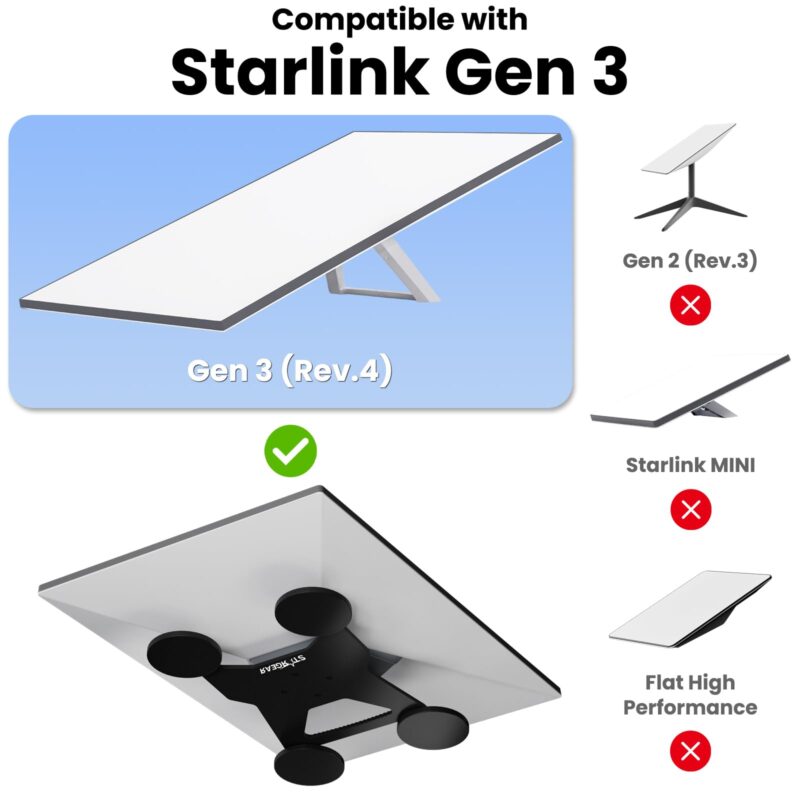
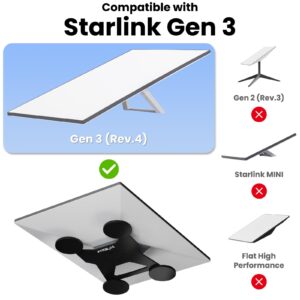
This kit fits Starlink Standard 4 and Standard 4 X dishes. If your purchase history says Gen 3, check the model name and the rear attachment point before ordering.
Starlink Mini, Standard Actuated and Flat High Performance dishes require their own mounting hardware. Check the model before comparing roof mounts that look similar in photos.
Check the Steel Surface Before Setup
Each magnetic base measures 88 mm across. Choose a clean, flat area of compatible steel with enough room for all four bases to sit flush.
Check the exact spot where the Starlink Standard Magnetic Mount will sit. Roof ribs, seams, dirt and curved panels can keep one or more feet from making full contact.
Aluminum, glass and fiberglass require a different attachment setup. If you plan to use separate metal plates, confirm that the plate maker specifies your surface and that STARGEAR lists the plates for this mount.
Fit the Bracket and Tighten the Locking Screws
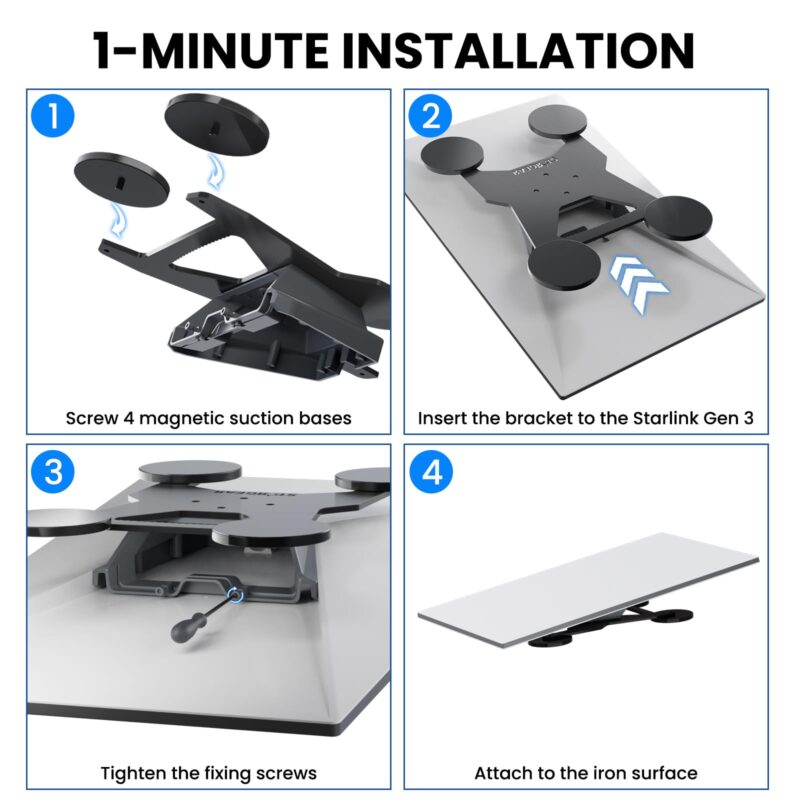
Thread all four feet into the bracket before placing the assembly on the steel. Seat the bracket in the dish’s rear mounting point, then connect the Starlink cable.
Tighten the dish retaining screws as directed in the kit instructions. Check that the dish is seated and that the cable has a clear path without being pinched.
Set Up After Parking
For a parked RV or campsite setup, place the assembled mount where all four feet sit flat. Leave enough room to reach the screws and cable when you pack up.
Use the Starlink app to check for obstructions and follow its alignment guidance. The fixed 8° angle describes the bracket’s geometry, and the app helps you find a clear view of the sky.
When taking down the Starlink Standard Magnetic Mount, disconnect the dish cable first. Lift the bracket clear of the surface before moving it so the bases don’t drag across the finish.
Remove the dish and mount before driving. Ask STARGEAR for verified wind and motion limits if you need a mount that can stay on a moving vehicle.
Why You’ll Love It
- Four 88 mm magnetic bases for compatible steel.
- No mounting holes to drill into the steel.Locking screws fasten the dish to the bracket.
- [Ensure Signal Stability] The heavy duty starlink car mount’s 8° tilt angle enhances signal stability while minimizing wind resistance during vehicle movement, offering a smoother, more consistent connection for your Starlink Gen3/V4 device on the go.
- Black aluminum alloy bracket with a fixed 8° tilt.
- Built for Standard 4 and Standard 4 X dishes.
FAQ
Q1: Which dishes fit the Starlink Standard Magnetic Mount?
A1: It fits Starlink Standard 4 and Standard 4 X. Starlink Mini, Standard Actuated and Flat High Performance dishes need their own mounts.
Q2: Do I need to drill holes or use tools?
A2: The magnetic feet attach to compatible steel without drilling. Use a suitable driver to tighten the dish retaining screws according to the kit instructions.
Q3: Can I place it directly on glass or aluminum?
A3: The feet need compatible steel for direct attachment. For glass or aluminum, confirm a compatible plate system for both the surface and this bracket.
Q4: Can I leave it on while driving?
A4: Use this setup while parked and remove it before driving. For travel, choose hardware with documented limits for use on a moving vehicle.
Q5: What comes with the Starlink Standard Magnetic Mount?
A5: You receive one black mounting kit with the lockable bracket and four magnetic bases. The Starlink dish and vehicle shown are for illustration.
Related products
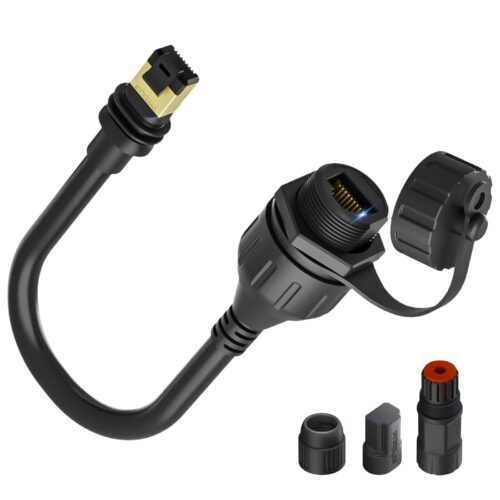
Starlink RJ45 Adapter Standard 4/4X & Mini – IP67 Coupler
Price range: $33.99 through $58.99
Select options
This product has multiple variants. The options may be chosen on the product page

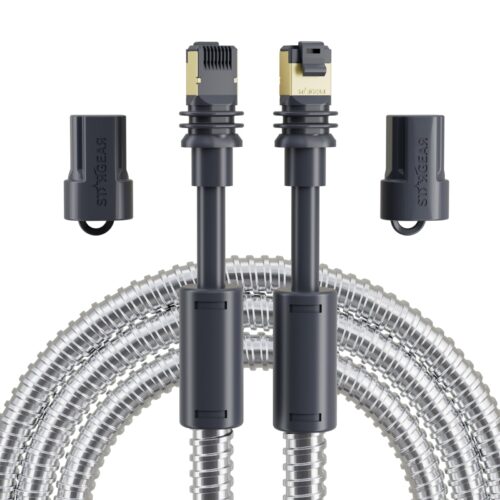
Starlink Steel Sleeve Cable for Mini and Standard 4/4 X
Price range: $29.99 through $79.99
Select options
This product has multiple variants. The options may be chosen on the product page

Reviews
There are no reviews yet.