


Starlink Mini DIY Mounting Case with Handle and Strap, Black or Gray
$49.99
The Starlink Mini DIY Mounting Case pairs a fitted silicone cover with a rigid handled plate and a detachable, adjustable shoulder strap. Choose black or gray and use the seven 1/4-20 threaded inserts to add compatible hardware later. Magnetic feet, clamps and suction mounts are sold separately.
| Brand / Manufacturer | STARGEAR |
|---|---|
| Model Number / Manufacturer Part Number | SG-STG99 |
| Compatible Device | Starlink Mini |
| Color Options | Black or gray |
| Materials | Silicone and ASA plastic |
| Threaded Mounting Points | 7 × 1/4-20 |
| Carrying Options | Integrated handle and detachable, adjustable shoulder strap |
| Storage | Rear compartment with magnetic lid |
| Included Components | Silicone cover, handled plate and shoulder strap |
| Unit Count | 1 case kit |
Starlink Mini DIY Mounting Case with Handle and Strap
The Starlink Mini DIY Mounting Case wraps around the Mini and gives you a handle for moving the dish between storage and setup. Choose a black or gray case.
The silicone cover for Starlink Mini fits around the dish, and the rigid handled plate includes built-in mounting threads. The case kit includes both parts and the shoulder strap.
A Starlink Mini Case with Handle and Strap
Use the integrated handle for short moves between your vehicle and campsite. Clip on the detachable shoulder strap and adjust its length when you want to carry the Mini hands-free.
Check the strap clips before lifting. Disconnect the power cable before carrying the dish so the connector and cable do not take the weight.
Use the Rear Compartment and Cable Opening
The Starlink Mini DIY Mounting Case has a rear storage compartment with a magnetic lid. Store the strap or a small coiled cable that fits without forcing the lid closed.
The cable opening gives you access to the Mini power port while the case is fitted. Route the cable out of the opening with enough slack to avoid pinching the connector.
Choose Hardware for the Seven Threaded Inserts
The Starlink Mini DIY Mounting Case has seven 1/4-20 threaded inserts. Plan which points you will use based on the accessory, its instructions and the space available behind the case.
Match the thread and screw length to the mounting accessory before connecting it. Use a support suited to the installation surface and check that it holds the Starlink Mini DIY Mounting Case without twisting.
If you already own a roof or rail mount, check its plate pattern as well as its screw thread. Matching threads alone do not establish fit.
Fit the Case Before Connecting Power
Support the Mini on a clean, flat surface while fitting the cover. Seat the edges evenly and check that the power port and ventilation areas are clear before use.
For a vehicle or boat setup, check the mounting surface and route the cable away from doors or hatches while parked or docked. Pack the dish before travel.
Why You’ll Love It
- Fitted silicone cover in black or gray.
- Integrated handle and detachable, adjustable shoulder strap.
- Seven 1/4-20 inserts for separately selected mounting hardware.
- Rear compartment for the strap or a small cable.
- Cable opening gives access to the Mini power port.
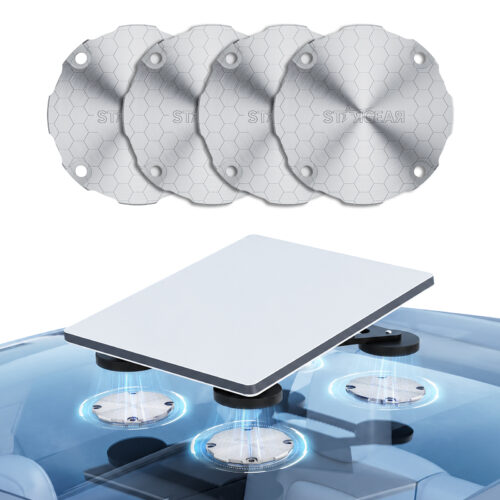
This case kit includes the silicone cover, handled plate and strap. Magnetic feet, clamps and suction mounts are separate purchases. Some images below show a separate magnetic mounting kit. The speed and pull-force labels refer to that pictured setup.


FAQ
Q1: Can I carry the Mini without buying a mount first?
A1: Yes. The Starlink Mini DIY Mounting Case includes the cover, handled plate and shoulder strap. Fit your own Starlink Mini and choose either carrying option.
Q2: Are magnetic feet, a clamp or suction cups included?
A2: Those mounting accessories are sold separately. Choose hardware that fits the threaded inserts and the surface you plan to use.
Q3: Does the case fit Starlink Standard 4 or 4 X?
A3: The Starlink Mini DIY Mounting Case is shaped for the Starlink Mini dish. Choose a case sized for your own Starlink model.
Q4: Can I connect power while the case is fitted?
A4: Yes. Route your own power cable through the opening and connect it to the Mini. Leave enough slack so the cable does not pull on the port.
Q5: What can I put in the rear compartment?
A5: Use it to store the shoulder strap or a small coiled cable. Check that everything fits and the magnetic lid closes without pressure.
| Color | Black, Grey |
|---|




Reviews
There are no reviews yet.