


Starlink Mini Lockable Roof Mount, Gray Aluminum Flat Base
$65.99
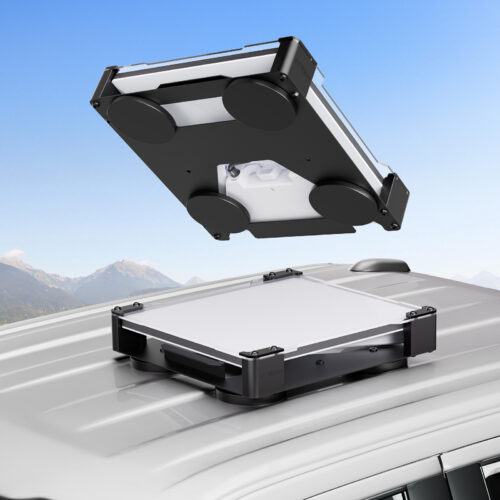
The Starlink Mini Lockable Roof Mount has a gray, powder-coated aluminum alloy base that fastens to a suitable flat surface on an RV, trailer or boat. The bracket gives the Mini a built-in 8° tilt, and tool-operated screws hold the dish in the cradle until you need to remove it.
| Brand / Manufacturer | STARGEAR |
|---|---|
| Model Name | SG-Mobility-MINI-GY |
| Manufacturer Part Number | SG-Mobility-MINI-GY-FBA-2 |
| Compatible Device | Starlink Mini |
| Color | Gray |
| Material | Aluminum alloy |
| Finish Type | Powder coated |
| Mounting Type | Mechanical fastening to a suitable flat surface |
| Tilt | 8° relative to the mounting surface |
| Special Feature | Tool-operated dish locking screws |
| Included Components | 1 mount, two sets of mounting fasteners, three flat washers, three hex nuts, a screwdriver and an installation guide |
| Listed Item Dimensions (L × W × H) | 9.84 × 7.09 × 9.8 in |
| Unit Count | 1 kit |
Starlink Mini Lockable Roof Mount for Flat Surfaces
The Starlink Mini Lockable Roof Mount bolts or screws onto a suitable flat panel, giving your Mini a dedicated spot on an RV, trailer or boat. This Starlink Mini flat mount has a gray, powder-coated aluminum alloy base and a cradle shaped to hold the Mini at an 8° tilt relative to the mounting surface.
Choose a Flat, Supported Mounting Location
Set the base on the proposed mounting spot and check that it sits flat. Leave room for the dish, its power cable and the tool used to reach the locking screws.
For a Starlink Mini RV roof mount or trailer setup, choose a solid, supported panel. Check the roof maker’s instructions before drilling and keep clear of seams, wiring and moving roof fittings.
On a ribbed roof or deck, check that the entire base is supported by a suitable mounting plate or platform approved for that surface. On a boat, choose a rigid mounting surface with room for lines, hatches and covers.
Check that the dish can see the sky from the chosen spot.
Fasten the Base and Seat the Mini
The Starlink Mini Lockable Roof Mount has three mounting holes around a central opening. Check the mounting guide and choose a fastening method suited to the surface and its backing.
Attach the flat mounting bracket before fitting the dish. If the fasteners pass through an exterior panel, follow the roof or deck maker’s sealing instructions for the penetrations.
Route your Mini power cable through the bracket opening with enough slack for the connector. Connect it to the Mini and seat the dish in the cradle according to the guide.
Lock the Dish and Remove It When Needed
The dish locking screws on the Starlink Mini Lockable Roof Mount sit at the edge of the cradle. Snug them with the supplied screwdriver and avoid overtightening.
Loosen the locking screws when you want to remove the Mini. Support the dish while disconnecting its power cable, then lift it clear of the bracket.
Check the Setup Before Use
Confirm that the base sits flush, the Mini is seated and the cable clears any sharp edges or pinch points. Recheck the fasteners if the dish has been removed and refitted.
Use the Starlink Mini Lockable Roof Mount for parked or docked setups. Stow the dish before travel and follow the equipment maker’s instructions for any in-motion installation.
Why You’ll Love It
- Screw-down base for a compatible flat mounting surface.
- Built-in 8° tilt relative to the mounting panel.
- Tool-operated screws hold the Mini in its cradle.
- Cable opening provides a route to the power port.
- Hardware, screwdriver and installation guide are included.


FAQ
Q1: What else do I need to use this mount?
A1: Bring your own Starlink Mini, power cable and power source. The Starlink Mini Lockable Roof Mount includes the bracket, mounting hardware, screwdriver and installation guide.
Q2: Can I attach the mount to a round roof rack bar?
A2: This bracket needs a flat, supported surface for its base. If your mounting point is a round rail, choose a rail clamp that matches its diameter.
Q3: How do I remove the Mini from the bracket?
A3: Loosen the cradle locking screws with the supplied screwdriver, support the dish and unplug its power cable. The screw-down base can stay in place.
Q4: Do I need to drill new holes?
A4: The Starlink Mini Lockable Roof Mount uses mechanical fasteners. Check for a suitable existing hole pattern. If drilling is needed, follow the surface maker’s instructions.
Q5: Can I install it on a trailer or boat?
A5: Yes, if a flat, supported mounting surface is available. Check fastener clearance and cable routing, and use the dish while parked or docked.
Related products

Starlink Mini DIY Mounting Case with Handle and Strap, Black or Gray
$49.99
Select options
This product has multiple variants. The options may be chosen on the product page

Starlink Mini 3-Magnet Mount with Silicone Case, Gray or Black
$69.99
Select options
This product has multiple variants. The options may be chosen on the product page


Starlink Mini Adjustable Clamp Mount Kit with Silicone Case
$109.99
Select options
This product has multiple variants. The options may be chosen on the product page


Reviews
There are no reviews yet.